Beginner’s Guide on Azure Data Engineering — Series 2

Connecting Azure Data Factory to Azure Storage and SQL Database
If you’ve been following along with my Azure Data Engineering Series, you’ll remember in Series 1: Setting up Azure & Ingesting Raw Data we laid the foundation by creating our resource group and ingesting raw data into Azure Data Lake Gen2 storage.
Now that we’ve set up our resource group and ingested raw data into our Azure Data Lake Gen2 storage, it’s time to start building out the pipeline. In this second series, we’ll introduce Azure Data Factory (ADF) — the powerful orchestration tool that helps us move and transform data across services.
In real-world data projects, data rarely stays in one place. You need a seamless way to pull data from your storage, clean or transform it, and load it into a structured environment like Azure SQL Database. That’s exactly what ADF enables us to do.
In this guide, I will walk through how to connect Azure Data Lake Storage and Azure SQL Database using ADF’s Linked Services and start preparing our data for transformation and analysis.
Let’s get started by provisioning Azure SQL database and Azure Data Factory in our existing resource group.
First, let’s provision and set up our Azure SQL Database. To do this, we need to create two separate resources: the SQL Server and the SQL Database itself.
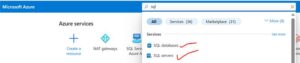
On your Azure portal, start by searching for “SQL Server” and “SQL Database” — you’ll need to create and configure both as part of this setup process.
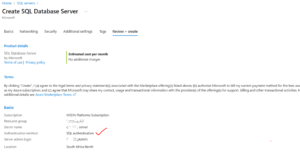
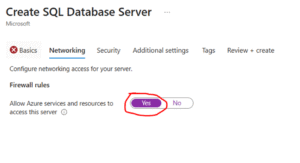
Use the image below as a guide to set up your SQL Server. In my case, I chose SQL authentication, created a username and password, then proceeded to review and create. Make sure you remember your login credentials — you’ll need them later when connecting to the database.
Let’s proceed to provision the SQL Database. Depending on your project needs, make sure you choose the compute and storage options that best fit your workload and budget.
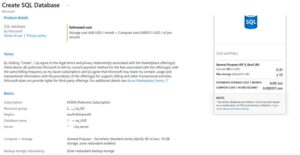
Cost Tip: For demos, choose the Basic SQL tier. This keeps costs low while still letting you practice. Azure Data Factory charges are based on pipeline runs and integration runtime hours. A simple demo like this may cost only a few cents.
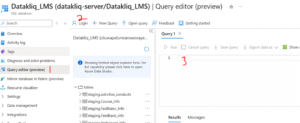
Once your setup is complete, go ahead and create your database and table — these will hold the data we’ll be working with in this project.
Common Mistake to avoid
- SQL Login Error → Make sure “Allow Azure services to access server” is checked in SQL Server Networking during the server creation
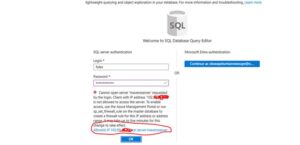
- Firewall Blocked → Add your client IP to SQL Server firewall settings.
- Authentication Failure → Ensure the Linked Service in ADF matches your chosen auth method (SQL Auth vs. Azure AD).
Next, we’ll provision Azure Data Factory, which I we will use to migrate data from our Gen2 storage into the Azure SQL Database.
What is Azure Data Factory?
Azure Data Factory (ADF) is a cloud-based data integration service that allows you to create, schedule, and orchestrate data pipelines at scale. It’s designed to help you move and transform data from various sources — whether on-premises or in the cloud — into centralized storage or analytics platforms like Azure Data Lake, Azure SQL Database, or Azure Synapse Analytics.
Think of ADF as the engine that helps you automate the flow of data from raw ingestion to final reporting or machine learning workflows.
Key Concepts
- Pipelines: A logical container for your entire data workflow. It holds a sequence of activities such as copying data, transforming it, or running stored procedures.
- Datasets: Represent your data structures (e.g., tables or files) that the pipeline will work with. They define where your data is stored and how it is structured.
- Linked Services: These are the connection strings or credentials that allow ADF to connect to external systems like SQL Server, Blob Storage, or REST APIs.
- Triggers: Enable you to schedule or automate pipeline execution. You can trigger a pipeline based on a time schedule or in response to an event.
Real-World Use Cases for ADF

- ETL Pipelines: Extract data from an e-commerce platform, transform it to match business logic, and load it into Azure SQL Database for reporting.
- Data Migration: Move data from an on-premises SQL Server to Azure Data Lake Gen2 for long-term storage and future analytics.
- Data Lake Organization: Use ADF to regularly ingest CSV files from FTP servers, clean the data, and organize it into structured folders in a data lake.
Azure Data Factory setup
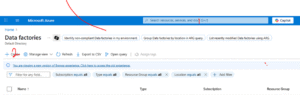
Head over to your Azure Portal and use the search bar at the top to search for “Data Factory”.
Once it appears, click on it, and you’ll be taken to the setup page. From there, click on “Create” to begin the provisioning process.
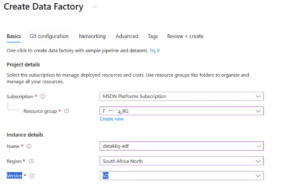
I will you walk through the setup step-by-step using the image below for guidance. Be sure to assign it to the same Resource Group you created earlier so all your services stay organized within one workspace
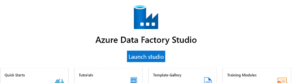
After creating the ADF, go ahead and launch it by clicking on Launch Studio. This will open up the environment where we’ll be building our pipelines and doing all the integration work.
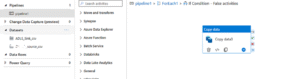
Inside our Data Factory, we’re going to create a pipeline that will help us ingest data from the Data Lake Gen2 storage.
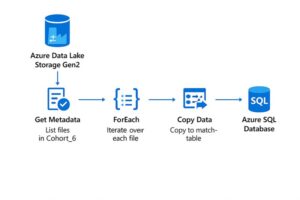
Quick Demo: Creating Your First Pipeline (Copy Data from Blob Storage to SQL Database)
In this demo, we’ll walk through how to set up a simple pipeline in Azure Data Factory to copy data from our Data Lake Gen2 storage into Azure SQL Database.
Here’s what we’ve got set up for this project:
- Container: yourcontainername
- Directory: Landing-zone/cohort6
- Files: Course_info.csv, Facilitator_info.csv, Feedback_info.csv, and a few others
- Destination Tables in Azure SQL DB:
- staging.Course_info
- staging.Facilitator_info
- staging.Feedback_info
We’ll be using the Copy Data activity inside a pipeline to move these files into their respective staging tables.
Conclusion
In this series, we focused on setting the stage for our data pipeline. We provisioned our Azure SQL Database, created a SQL Server, and set up Azure Data Factory — the tool we’ll use to move data between services. At this point, we have our data sitting in Azure Data Lake Storage Gen2, and our target tables are ready in Azure SQL Database.
The next step is to build and configure our pipelines inside Azure Data Factory to handle the actual data movement.
Stay tuned for Series 3, where we’ll parameterize our pipelines and introduce advanced transformations.
See you in the next series!
Authored by: